Part 7 - All Tolerances Are Not Created Equal
In Part 1, I talked about how dimensioning with common stock sizes in mind can reduce costs and save time. In Part 2, I talked about how the shape of the finished part can impact costs. In Part 3, I talked about lowering costs by thinking about inside corner radii and depth during the design process. In Part 4, I talked about the importance of designing to minimize distortion and warping. In Part 5, I talked about holes and tapping depths. In Part 6, I talked about reducing tooling requirements and options for corners and edges.
Best Practice #12: All tolerances are not created equal
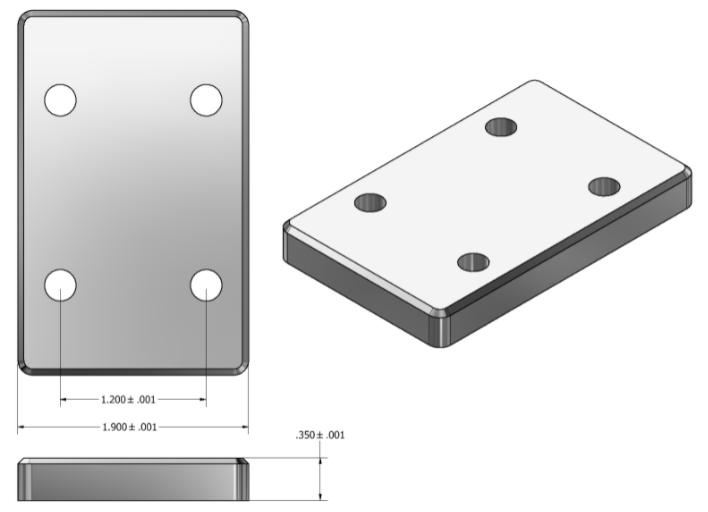
In the drawing below, the 0.350” dimension is much more difficult to meet as compared to the 1.2” or 1.9” dimension. This is mostly because the two surfaces making up the 0.350” dimension are machined in two different setups. The 1.2” and 1.9” dimensions are machined in the same setup and not especially difficult to meet.
For tight tolerance dimensions that tie one machining setup to another (0.350” below), special time consuming attention has to be given for each part.


Comments